
Installing Chef Client on a Linux machine is a crucial step towards managing and automating infrastructure. In this guide, we will walk you through the steps of installing Chef Client on Linux and configuring it to work with your infrastructure.
Prerequisites
Before you begin, you need to have a Linux machine with root access and an internet connection. You also need to have a Chef account, which you can sign up for on the Chef website.
Chef has three major components:
- Workstation
- Server
- Nodes
For demonstration purpose I will be using only one Node. There can be hundreds of Nodes managed by one Chef Server. I am using two CentOS Virtual Images one for Workstation and other for a Node. For Server, I will use the hosted version of Chef Server (on a cloud) available at manage. chef. myself
Following are the steps to install Chef:
- Install Chef DK (Development Kit) on Chef Workstation
- Setup a Chef Server
- Create a Recipe or a Cookbook / download a Cookbook from Chef Supermarket in Workstation
- Upload a Cookbook on the Chef Server
- Connect A Node To The Chef Server
- Deploy the Cookbook from the Server to the Node
1. Install Chef DK (Development Kit)
In my Chef Workstation I will install Chef DK. Chef DK is a package that contains all the development tools that you will need when coding Chef. Here is the link to download Chef DK.
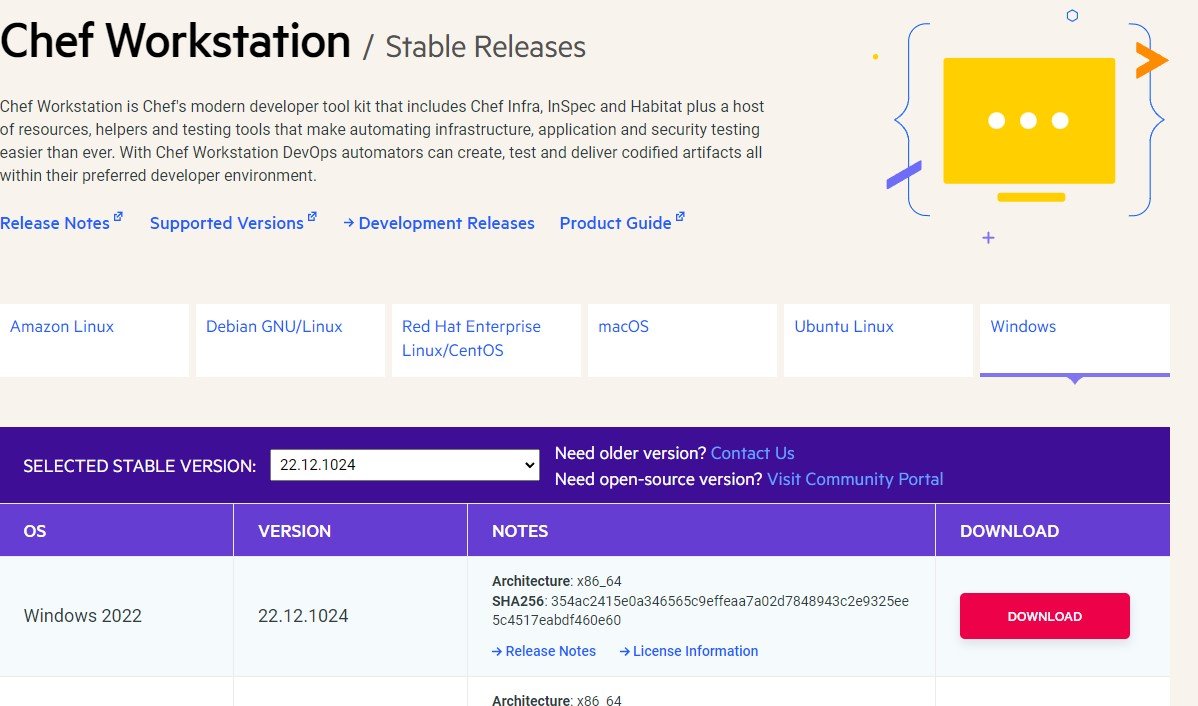
Here, choose the operating system that you are using. I am using CentOS 6.8. So, I will click on Red Hat Enterprise Linux.
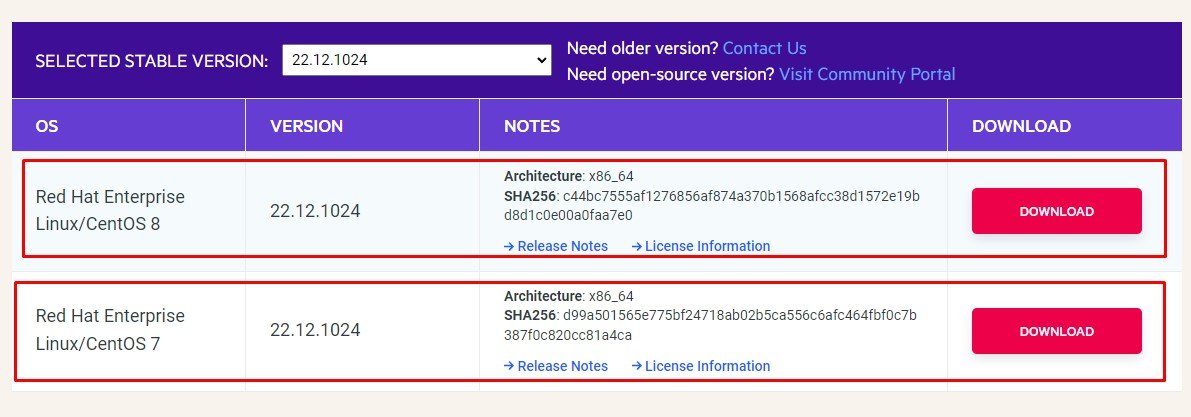
Copy the link according to the version of CentOS that you are using. I am using redhat, as you can see that is highlighted in the above screenshot.
Go to your Workstation terminal and download the Chef DK by using wget command and paste the link.
Execute this command:
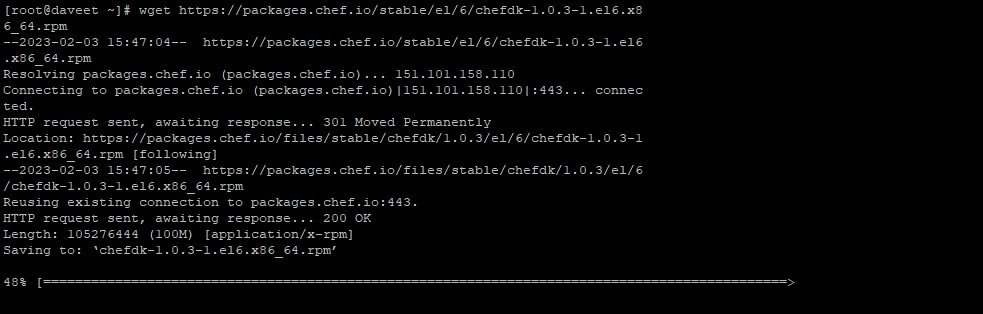
The package is now downloaded. Now I will install this package using rpm.
Execute this:
- rpm -ivh chefdk-1.0.3-1.el6.x86_64.rpm

STEP 2. Setup Chef Server
You can use a physical machine, I will use the hosted version of Chef Server on the cloud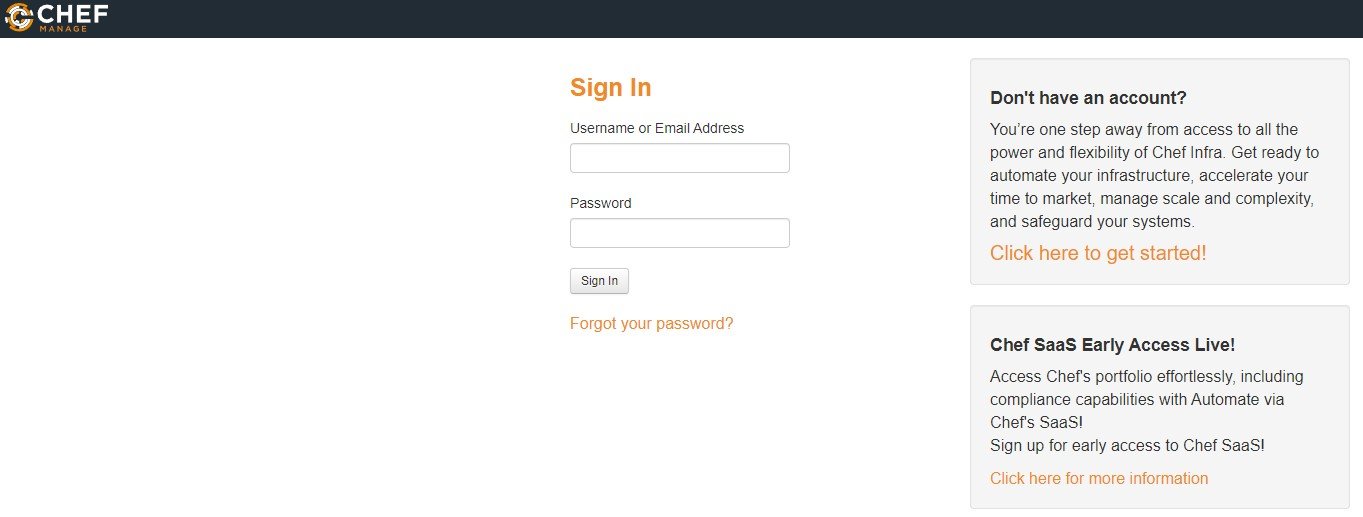
Over here, create an account if you don’t have one. Once you have created an account, sign-in with your login credentials.
This is how Chef Server looks like.
If you are signing in for the first time, the very first thing that you will be doing is creating an organization. Organization is basically a group of Machines that you will be managing with the Chef Server.
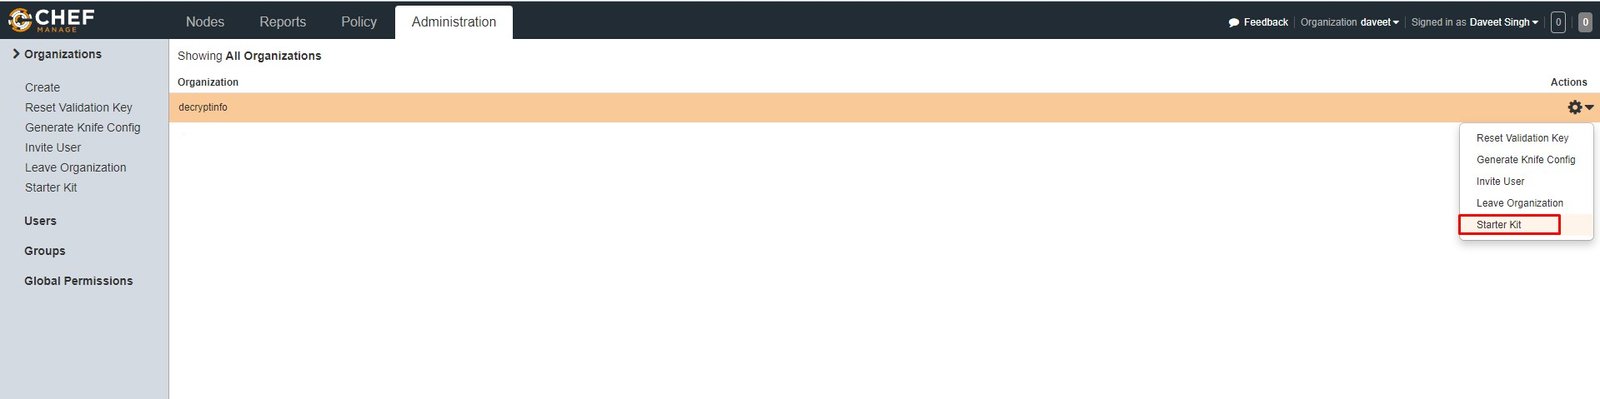
First, I will go to the administration tab. Over there, I have already created an organization called decryptinfo. So I need to download the starter kit in my Workstation. This starter kit will help you to push files from the Workstation to the Chef Server. Click on the settings icon on the right hand side and click on Starter Kit.
This is how Chef Server looks like.
If you are signing in for the first time, the very first thing that you will be doing is creating an organization. Organization is basically a group of Machines that you will be managing with the Chef Server.
First, I will go to the administration tab. Over there, I have already created an organization called decryptinfo. So I need to download the starter kit in my Workstation. This starter kit will help you to push files from the Workstation to the Chef Server. Click on the settings icon on the right hand side and click on Starter Kit.
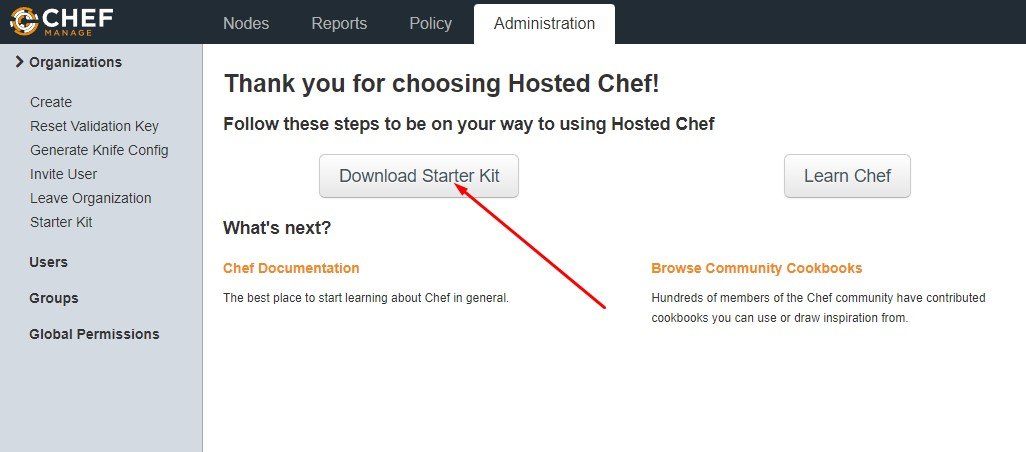
Now you will get an option to download the Starter Kit. Just click on it to download the Starter Kit zip file.
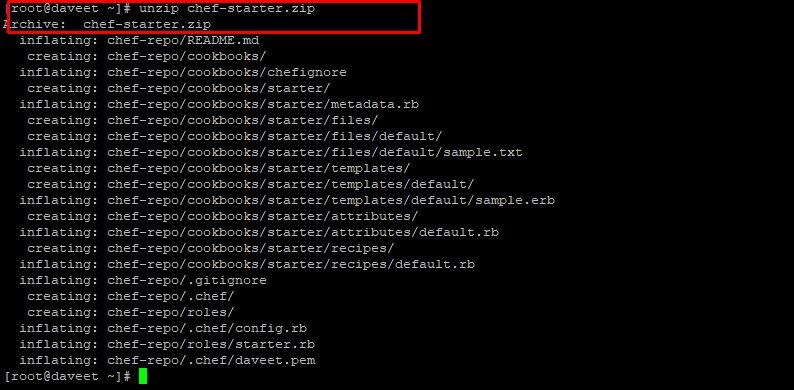
Move this file to your root directory. Now unzip this file by using unzip command in your terminal. You will notice that it includes a directory called chef-repo.
Execute :
unzip chef-starter.zip
Now move this starter kit to the cookbook directory in chef-repo directory.
Execute :
mv starter /root/chef-repo/cookbooks
STEP 3. Download A Cookbook From Chef Supermarket In Workstation
Chef Cookbooks are available in the Cookbook Supermarket, we can go to the Chef Supermarket. Download the required Cookbooks from supermarket.chef.io. I’m downloading one of the Cookbook to install Apache from there.
Execute :
cd chef-repo
knife cookbook site download learn_chef_httpd
Don’t Miss:
There is Tar ball downloaded for the Apache Cookbook. Now, I will extract the contents from this downloaded Tar file. For that, I will use tar command.
Execute :
tar -xvf learn_chef_httpd-0.2.0.tar.gz
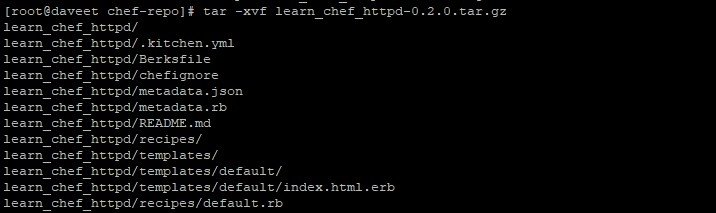
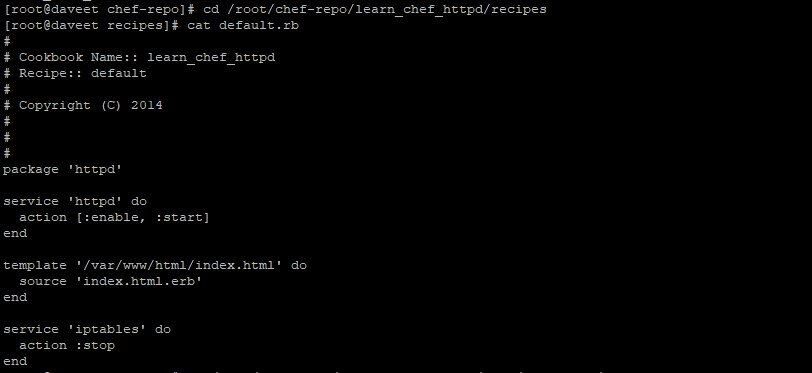
All the required files are automatically generated under this Cookbook. There is no requirement to make any modifications. Let’s check the Recipe description inside recipe folder.
Execute :
cd /root/chef-repo/learn_chef_httpd/recipes
cat default.rb
Now, I will just upload this cookbook to my Chef Server as it looks perfect to me.
STEP 4. Upload A Cookbook In The Chef Server
In order to upload the Apache Cookbook that I have downloaded, first move this learn_chef_httpd file to the Cookbooks folder in the chef-repo. Then change your directory to cookbooks.
Execute :
mv /root/chef-repo/learn_chef_httpd /root/chef-repo/cookbooks
cd /root/chef-repo/cookbooks
![]()
Now in this directory, execute the below command to upload the Apache Cookbook:
Execute :
knife cookbook upload learn_chef_httpd
Verify the Cookbook from the Chef Server Management console. In the policy section, you will find the Cookbook that you have uploaded. Refer the screenshot below:
Now, our final step is to add Chef Node. We’ve setup a Workstation, a Chef Server and we need to add our Nodes to the Chef Server for automation.
STEP 5. Connect A Node To The Chef Server
The terminal colour of my Node machine is different from the Workstation so that you will be able to differentiate between both.
I just need the IP address of my Node for that I will execute the below command in my Node machine.
Execute :
ifconfig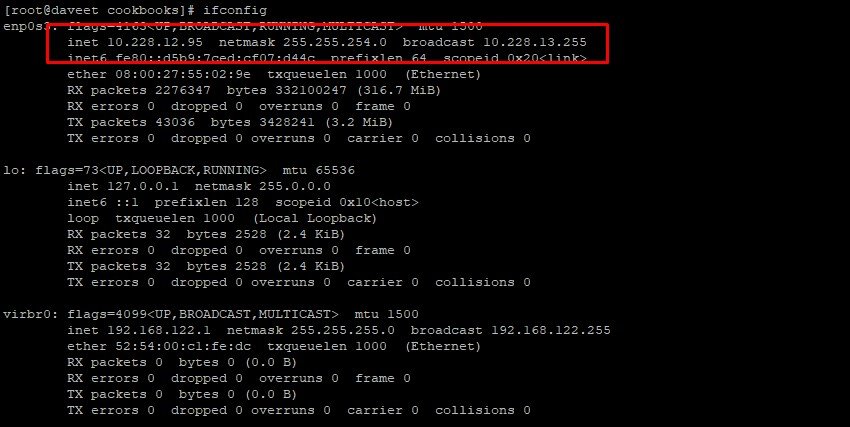
Now , Add Chef Node to the Server by executing Knife Bootstrap command in which I will specify the IP address of The Chef Node and its name. Execute the command shown below:
Execute :
knife bootstrap 10.228.12.95 –ssh-user root –ssh-password edureka –node-name chefNode
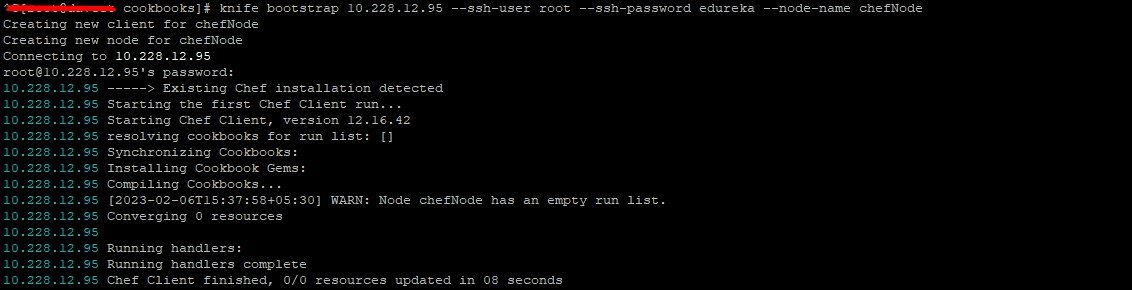
This command will also initialize the installation of the Chef-Client in the Chef Node. You can verify it from the CLI on the Workstation using the knife command,as shown below:
Execute :
Knife node list
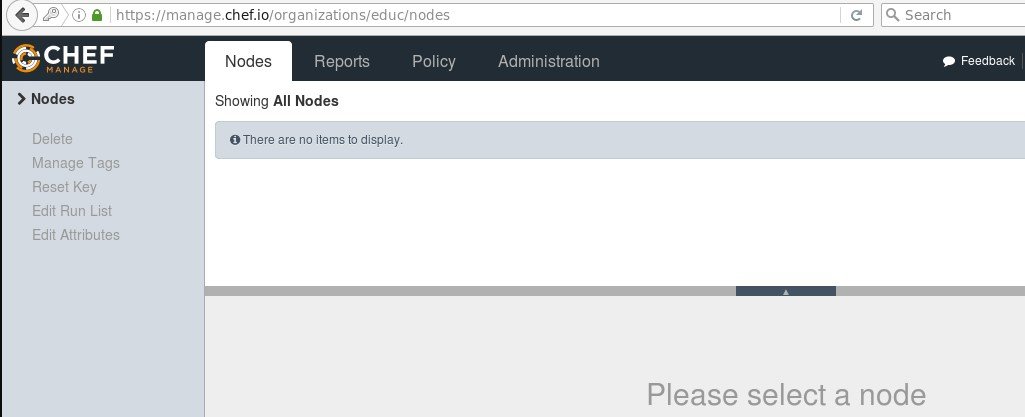
You can also verify from the Chef Server. Go to the nodes tab in your Server Management Console, here you will notice that the node that you have added is present. Refer the screenshot below:
6. Deploy The Cookbook From The Server To The Node
Let’s see how we can add a Cookbook to the Node and manage its Run list from the Chef Server. Run List describes the order in which the Cookbooks should be executed. As you can see in the screenshot below, click the Actions button and select the Edit Run list option to manage the Run list.
Now login to your Node and just run chef-client to execute the Run List.
Execute this:
chef-client
You have successfully installed Chef and deployed Apache from Chef Server to the Node.
Don’t Miss: